Student Grid
The Student main menu displays a list of all students that have been created for your business
Note: The students are displayed in a grid a page at a time. For example, if you have 30 students created and you display 5 at a time, there will be 6 pages of students:
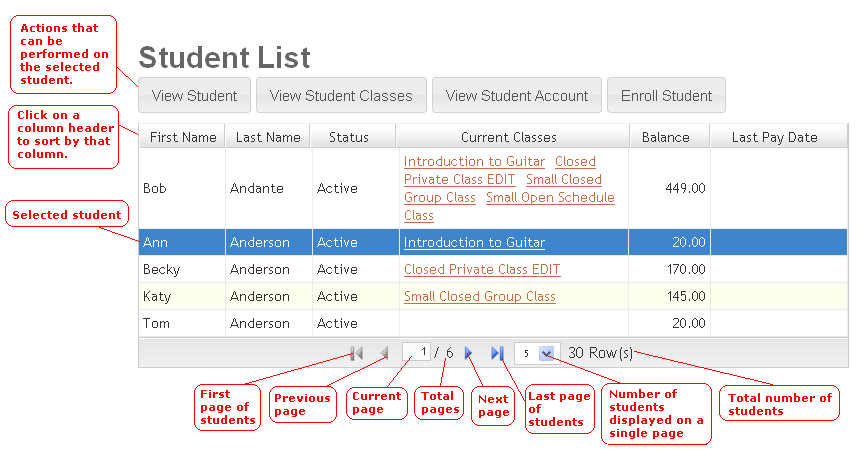
If you click on the "Balance" column, you will see the list of student's with the highest outstanding account balance. If you click on the balance column again, you will see the students with the lowest balance. Similarly, if you click on the "Last Pay Date" column, the students will be sorted by the date they made a payment on their account. You can use these sorting methods to quickly find students with high account balances or delinquent payments.
To select a student in the grid, simply click on the row in the grid. The row in the grid will turn blue for the selected student. With the selected student, you can:
- View Student
When you click the "View Student" button, the student's summary page is displayed. The summary page give you a quick "snapshot" of the student which includes statistics like last payment date and amount, current classes, total revenue from student, and more.
- View Student Classes
When you click on the "View Student Classes" button, the complete history of classes taken by the student is displayed. This class history includes currently enrolled classes, waiting lists, and completed classes. You will also be able to enroll a student from the classes history page.
- View Student Account
When you click on "View Student Account", the student's financial transactions will be displayed. From the accounting page you will be able to see the student's outstanding balances and you will be able to post additional transactions.
- Enroll Student
When you click on this button, you will be able to enroll the student in a class. During the enrollment process, the student's tuition is automatically posted to the account.