Setting Up Online Enrollment
Studioware allows you to offer online class enrollment on your website. The process of setting up online enrollment involves indicating which classes are available for online enrollment, followed by adding a link from your website to the online enrollment website.
To setup online class enrollment, follow these instructions:
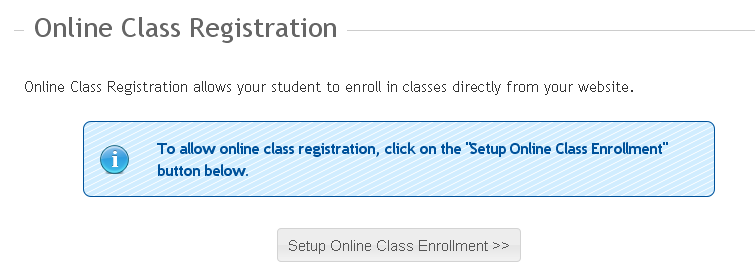
- Click on Administration in the main menu followed by "Online Classes" in the sub menu. The online class registration screen appears as follows:
 Default Settings:
By default, online enrollment is not enabled. You must manually enable online enrollment.
- To enable online class enrollment, click on the "Setup Online Class Enrollment" button.
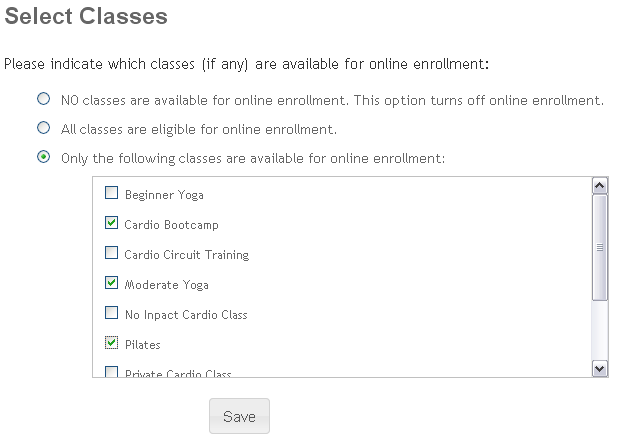
- Next, you need to specify if all classes are available for online enrollment, or just select classes. If all classes are available for online enrollment, simply click on the option "All classes are eligible for online enrollment". If only a select group of classes will be available for online enrollment, select the "Only the following classes are available for online enrollment" option followed by the list of classes that are exposed for online enrollment. Click on the "Save" button to save your changes:
- The online enrollment screen will now contain additional information about integrating the Studioware Online Enrollment pages with your website.
Integrating online enrollment with your website
There are two ways to integrate the Studioware online enrollment with your website:
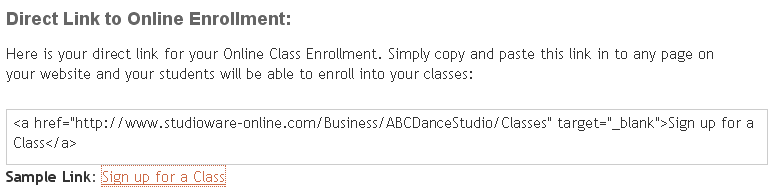
- Linking:
Linking integration involves placing a link on your website to the Studioware online enrollment website. The Online Class Registration page contain the html code for the link and a sample link:
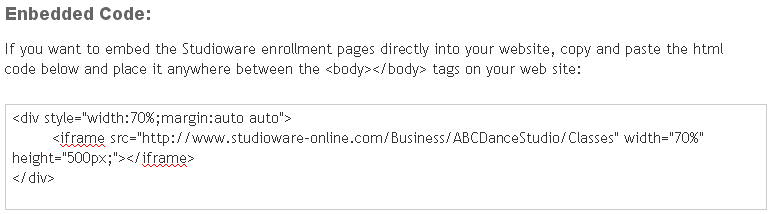
- Embedding:
The second technique involves embedding the Studioware online enrollment pages within your website. The html code that is required to accomplish this is found on the online enrollment setup page: